
Last Updated on December 15, 2022 by Peter Z
Looking for ways to make your PowerPoint look more professional? Check out six easy design tricks we recommend that will have every slide polished and eye-catching.
You’ll be surprised, but one of the most overlooked things in presentations is typos. In this blog, we’re sharing easy tips to avoid and fix mistypes and use the PowerPoint spellcheck tool effectively, so your audience won’t get distracted by text errors and stays focused on the presentation content.
This article is a part of our Design Tips for Professional Presentation series, which provides ideas for designing presentations that will help you stand out, see more on our blog. You can also check out our e-book with six critical design issues and graphics examples:
Presentation Design Cheat Sheet
Inside you’ll find more actionable steps for a professional slide look, including PowerPoint shortcuts and topics:
- Slide margins and white space – make your slide easy to read
- Alignment of texts, charts & tables
- Consistency – how to keep one style through the presentation
- Natural and easy-to-follow reading flow
- How to highlight the main idea on the slide
Let’s dive into the topic of how you can ensure a professional reading experience for your audience.
Spellcheck: easy trick to ensure an efficient reading experience for your audience
A sign of a professional and well-prepared document is a lack of mistypes. That works also for presentation slides.
When finalizing your PowerPoint deck, use the spellcheck tool to catch any mistypes that could appear when writing the slide content.
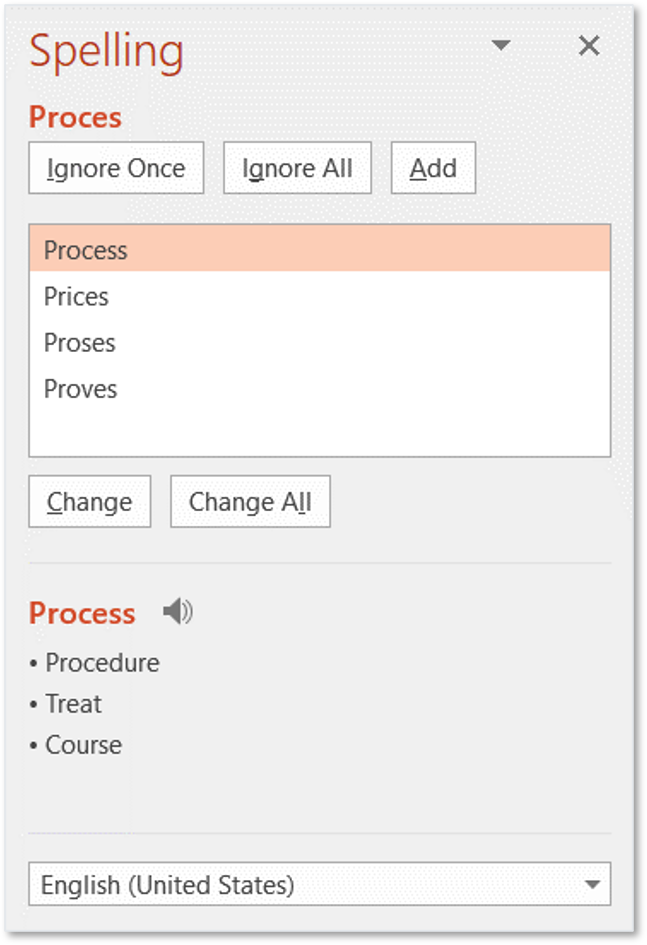
To access the PowerPoint Spellchecking tool, find it in the top menu’s Review tab / Spelling, or use shortcut F7 to run spell-check over all the slides.

Notice, that the spellchecker uses the language assigned to specific text objects. The language is assigned at the moment of typing, based on your current keyboard language. For changing the keyboard language in MS Windows use the Win key + Space.
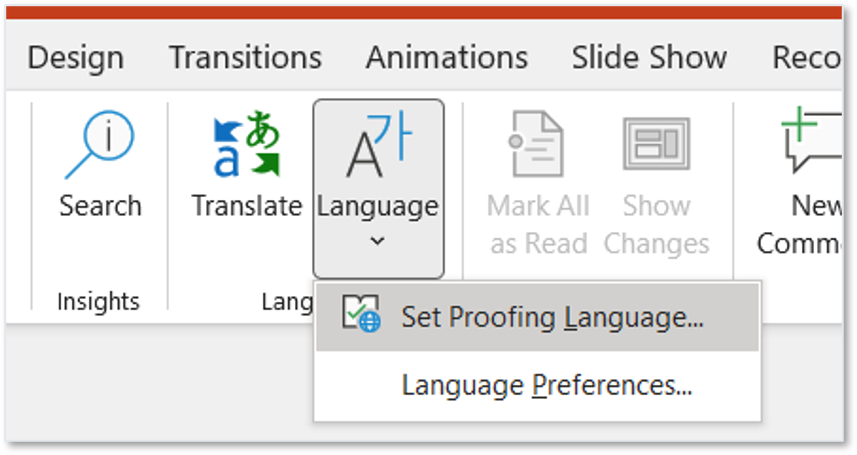
If you need to change the assigned language of already written text, select the text box first, then go to the top menu: Review tab, click Language, and from the drop-down menu select Set Proofing Language.
The spellchecker works the same way also in other MS Office applications, in Word for example.
I suggest also exploring and using the synonyms options there, to get more variety of words you use frequently.
It’s worth knowing and using this handy grammar-checking tool. It takes you a minute to check the whole slide deck. And you will avoid creating an impression of the presentation done in a rush without a proper final check.
Microsoft is already introducing pretty decent translation or caption generation tools in Office 365. And I bet with new PowerPoint versions we can expect more advanced features.
More presentation resources for your inspiration
If you want to know how you can improve your slides further, check those resources:
- 6 presentation design tips conveniently gathered in an ebook (including this trick)
- Too much info on a slide? Simplify complex presentation in three steps
- How To Be Creative When Preparing Presentation
- 5 Ideas for Writing Eye-Catching Title for Your Presentation
Get our free sample and let’s stay in touch for more tips and resources!